[하루의 날씨] isHidden과 오토레이아웃의 관계
문제 상황?

디자이너가 원한 View는 텍스트 입력과 이미지 추가를 하나의 View에서 처리할 수 있어야 했다. 이를 구현하기 위해 커스텀 View를 개발했고, ScrollView 안에 TextView와 ImageView를 함께 배치해 사용했다.
이미지는 필요할 때만 보여주면 되었기 때문에, 처음에는 이미지가 없을 때 isHidden 처리를 통해 ImageView를 숨기는 방식으로 구현했다. 하지만 이는 단순히 뷰를 가리기만 할 뿐 레이아웃 상의 크기는 그대로 차지하고 있어, 다른 뷰들의 위치를 조정하는 데 어려움이 있었다.
isHidden
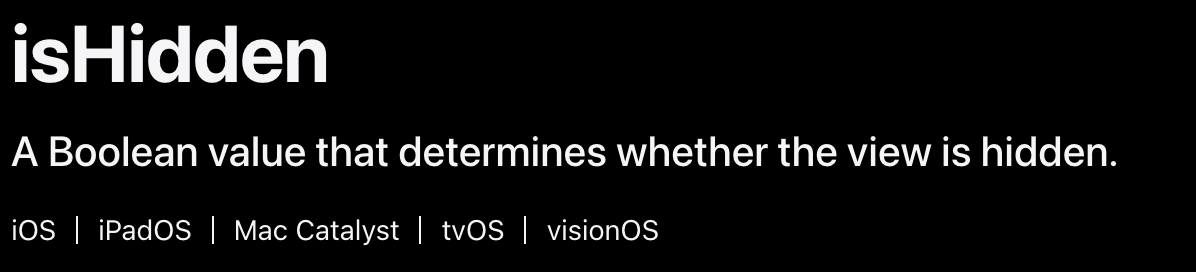
isHidden은 UIView의 속성으로, true면 뷰를 화면에 보이지 않게 숨기고, false이면 다시 보이게 하는 기능이다.
❗️ 단, isHidden은 단순히 표시와 입력만 끄고 뷰 계층엔 계속 남는다. 즉, 제약은 그대로 적용되고 레이아웃 계산에도 포함된다. 이는 애플 공식 문서에서도 확인할 수 있다.
A hidden view disappears from its window and does not receive input events. It remains in its superview’s list of subviews, however, and participates in autoresizing as usual. Hiding a view with subviews has the effect of hiding those subviews and any view descendants they might have. This effect is implicit and does not alter the hidden state of the receiver’s descendants.
숨겨진 뷰는 윈도우에서 사라지고 입력 이벤트를 받지 않습니다. 하지만 슈퍼뷰의 서브뷰 목록에는 그대로 남아 있으며, 평소처럼 자동 리사이징(autoresizing)에 참여합니다. 서브뷰를 가진 뷰를 숨기면, 그 서브뷰와 그 하위 뷰들도 함께 숨겨집니다. 이 동작은 암묵적으로 이루어지며, 리시버(해당 뷰)의 하위 뷰들에 설정된 hidden 상태 자체를 변경하지는 않습니다.
❓ 그래서 왜 "isHidden 처리 했는데 자리를 차지"하나요?
일반 UIView 계층(StackView 제외)에서는 해당 뷰의 제약이 그대로 유효한다. 예를 들어, imageView.heightAnchor = 200 같은 제약이 있으면 isHidden = true여도 높이 200이 유지된다. 주변 뷰 제약(Top/Bottom Spacing 등)도 그대로라서 크기는 그대로 남는다.
❗️예외적으로 UIStackView 안에 arrangedSubview로 들어간 뷰는 isHidden = true일 때 레이아웃에서 제외되어 공간을 차지하지 않도록 처리된다. (자동으로 수축/재배치)
Hidden views do not affect the appearance or layout of a stack—so the stack’s appearance remains unchanged. Then, in an animation block, the view is revealed and the scroll offset is updated, animating the view’s appearance.
숨겨진 뷰는 스택(stack)의 모양이나 레이아웃에 영향을 주지 않으므로, 스택의 외형은 그대로 유지됩니다. 이후 애니메이션 블록 안에서 해당 뷰를 표시하고 스크롤 오프셋을 업데이트하면, 뷰의 표시가 애니메이션으로 나타납니다.
해결?
private var imageHeightConstraint: NSLayoutConstraint!
private var textTopToImageConstraint: NSLayoutConstraint!
private var textTopToContentTopConstraint: NSLayoutConstraint!

override func setAutoLayout() {
    NSLayoutConstraint.activate([
      NSLayoutConstraint(item: scrollView, attribute: .top, relatedBy: .equal, toItem: self.safeAreaLayoutGuide, attribute: .top, multiplier: 1.0, constant: 0.0),
      NSLayoutConstraint(item: scrollView, attribute: .leading, relatedBy: .equal, toItem: self.safeAreaLayoutGuide, attribute: .leading, multiplier: 1.0, constant: 0.0),
      NSLayoutConstraint(item: scrollView, attribute: .trailing, relatedBy: .equal, toItem: self.safeAreaLayoutGuide, attribute: .trailing, multiplier: 1.0, constant: 0.0),
      NSLayoutConstraint(item: scrollView, attribute: .bottom, relatedBy: .equal, toItem: self.safeAreaLayoutGuide, attribute: .bottom, multiplier: 1.0, constant: 0.0),
    ])

    NSLayoutConstraint.activate([
      NSLayoutConstraint(item: imageView, attribute: .top, relatedBy: .equal, toItem: scrollView.contentLayoutGuide, attribute: .top, multiplier: 1.0, constant: 24.0),
      NSLayoutConstraint(item: imageView, attribute: .leading, relatedBy: .equal, toItem: scrollView.frameLayoutGuide, attribute: .leading, multiplier: 1.0, constant: 24.0),
      NSLayoutConstraint(item: imageView, attribute: .trailing, relatedBy: .equal, toItem: scrollView.frameLayoutGuide, attribute: .trailing, multiplier: 1.0, constant: -24.0),
    ])
    imageHeightConstraint = NSLayoutConstraint(item: imageView, attribute: .height, relatedBy: .equal, toItem: .none, attribute: .notAnAttribute, multiplier: 1.0, constant: 0.0)
    imageHeightConstraint.isActive = true

    NSLayoutConstraint.activate([
      NSLayoutConstraint(item: textView, attribute: .leading, relatedBy: .equal, toItem: scrollView.frameLayoutGuide, attribute: .leading, multiplier: 1.0, constant: 0.0),
      NSLayoutConstraint(item: textView, attribute: .trailing, relatedBy: .equal, toItem: scrollView.frameLayoutGuide, attribute: .trailing, multiplier: 1.0, constant: 0.0),
      NSLayoutConstraint(item: textView, attribute: .bottom, relatedBy: .equal, toItem: scrollView.contentLayoutGuide, attribute: .bottom, multiplier: 1.0, constant: 0.0),
    ])
    textTopToImageConstraint = NSLayoutConstraint(item: textView, attribute: .top, relatedBy: .equal, toItem: imageView, attribute: .bottom, multiplier: 1.0, constant: 12.0)
    textTopToContentTopConstraint = NSLayoutConstraint(item: textView, attribute: .top, relatedBy: .equal, toItem: scrollView.contentLayoutGuide, attribute: .top, multiplier: 1.0, constant: 12.0)

    textTopToContentTopConstraint.isActive = true
    textTopToImageConstraint.isActive = false

    imageView.isHidden = true
  }

func configure(image: UIImage?) {
    if let image {
      imageView.isHidden = false
      imageView.configure(image: image)

      let availableWidth = scrollView.frameLayoutGuide.layoutFrame.width - 24
      let ratio = image.size.height / image.size.width
      let targetHeight = availableWidth * ratio

      imageHeightConstraint.constant = min(targetHeight, 350)

      textTopToContentTopConstraint.isActive = false
      textTopToImageConstraint.isActive = true
    } else {
      imageView.configure(image: nil)
      imageView.isHidden = true
      imageHeightConstraint.constant = 0.0

      textTopToImageConstraint.isActive = false
      textTopToContentTopConstraint.isActive = true
    }

    setNeedsLayout()
    layoutIfNeeded()

    DispatchQueue.main.async { [weak self] in
      self?.adjustScrollPosition()
    }
제약을 변수로 담아두고, 상황에 따라 토글하는 방식을 사용해서 처리했다.
✅ 이미지 높이 제약(imageHeightConstraint)
- 이미지가 없을 때는 0
- 이미지가 있을 때는 비율에 맞춰 동적으로 계산 후 최대 350으로 제한
✅ 텍스트 위치 제약
- textTopToContentTopConstraint : 이미지가 없을 때 텍스트를 ScrollView 최상단에 붙임
- textTopToImageConstraint : 이미지가 있을 때 텍스트를 이미지 바로 아래로 붙임
이미지가 있을 때/없을 때 레이아웃이 자연스럽게 전환되고, 불필요한 빈 공간 없이 텍스트 뷰가 원하는 위치로 이동하도록 구현했다.
즉, 단순히 isHidden만 쓰는 대신 제약 자체를 상황에 맞게 토글 해주는 것이 핵심!
❓StackView의 성질을 이용하면 더 간단하게 구현할 수 있지 않을까?
imageView.isHidden = (image == nil)StackView에 ImageView, TextView를 arrangedSubview로 하고, 위처럼 처리하면 더 간단하게 구현할 수 있을 것 같은데.. 엄청 드라마틱하게 변하지는 않을듯!